
A breakdown of how I built this digital clock feature, with screenshots.
Find the live version here: Digital Clock
Technologies Used:
- From this tutorial: Digital Clock by GreatStack
- Build from scratch
- Using HTML, CSS, and JS
- Hosted on GitHub Pages
- Built in VSCode

This was the start! Basically just getting the necessary files added and linked. I really like to do what my Coding Bootcamp teacher would call a “sanity test” whenever I add a file. That’s when you test your link by changing something in the new file, then checking the main file in the browser to confirm that the change is reflected. Here, I change the background color to pink, and in JS I add a little console.log that I can see when I inspect the page.
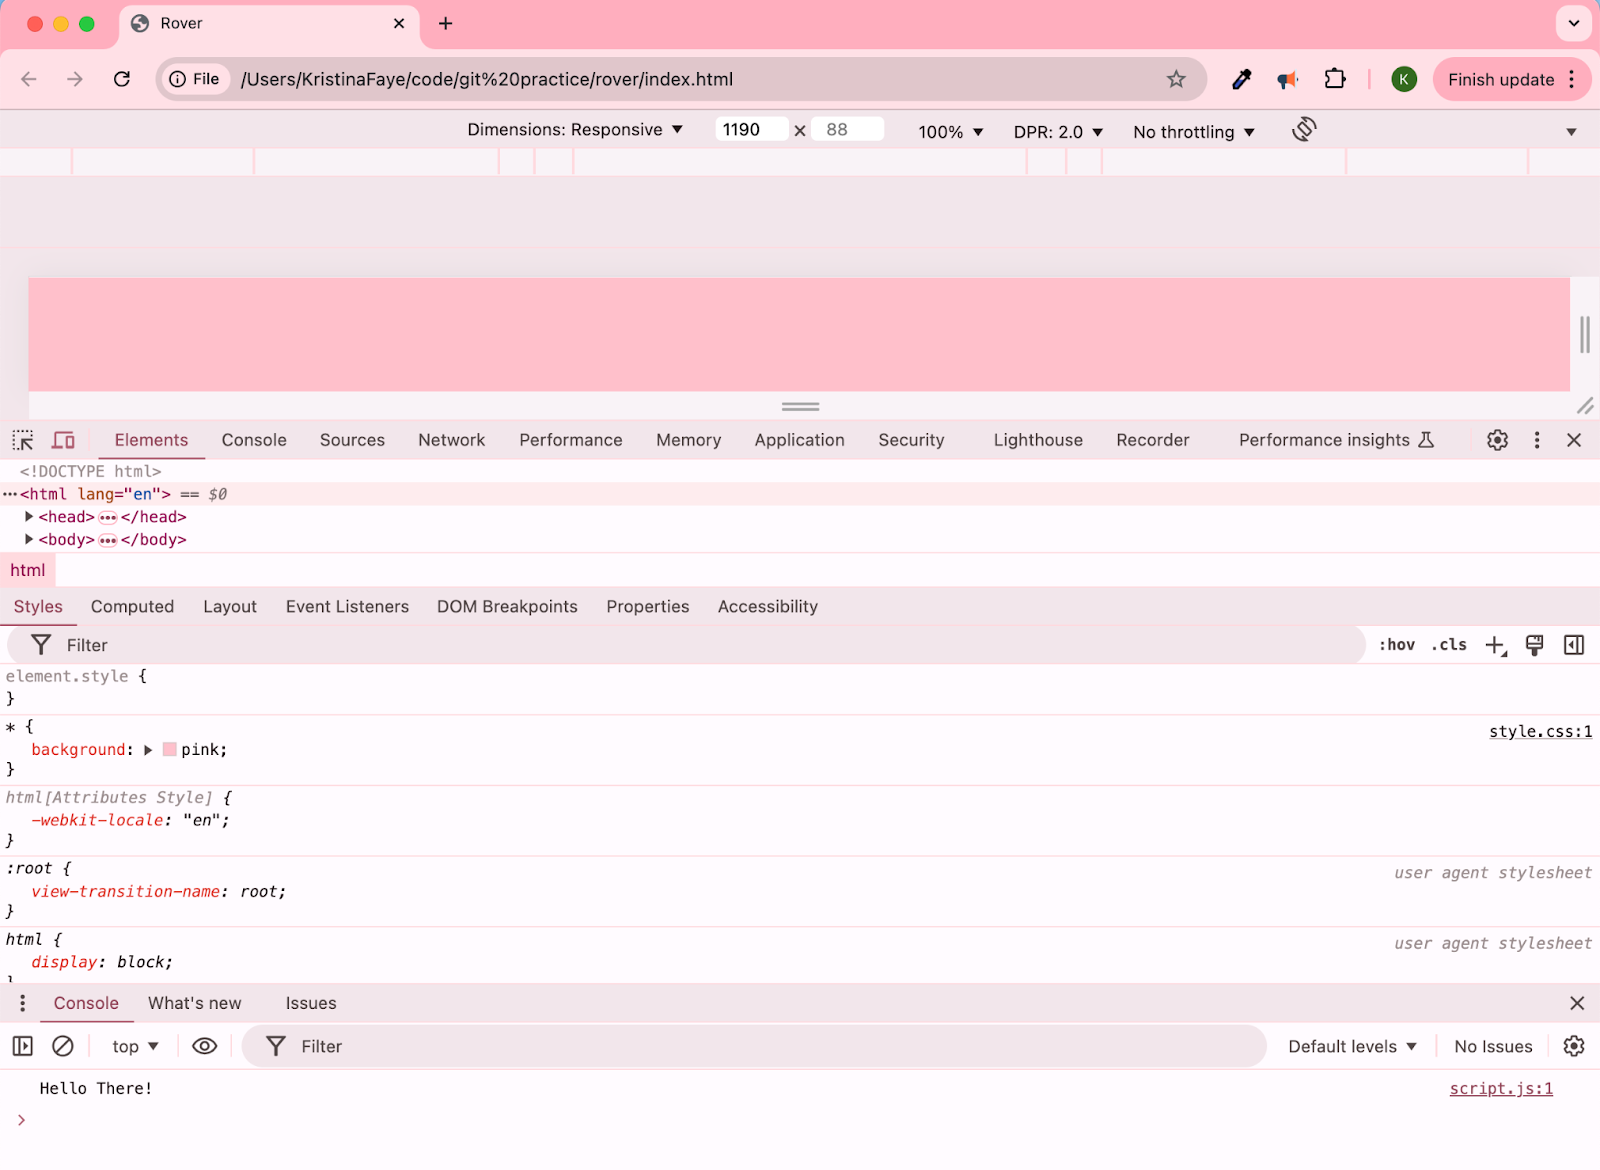
*Screenshot of my latest repo, since the Digital Clock one is now a digital clock with its own styling, and I’m taking these screenshots AFTER the process is done. But I always start my programs this way in this liminal testing space. So you can see the background of the page is pink, due to the Styles rule, and at the bottom inside the Console is my ode to Obi Wan JS check.

(Lol, switched to Dark Mode because I started this post before work, and it’s now after.)
Anyway this is a very simple commit, but I wanted to point it out because I’ve been using Emmet Snippets to add everything in HTML. Even the boilerplate. So this commit’s changes, the div with the class of “hero” was added by typing “.hero” and hitting enter. VSCode then auto-populates the space with the div, including the triangle brackets, the word div, and the closing tag, all with the class of hero.
This tutorial came from the YouTube Channel GreatStack, and they use Emmet Snippets the whole time in HTML. As does Future Coders. And this is great because I get to see this technique modeled, so the benefits of using them are abundantly clear and I can easily follow their example. I LOVE keyboard shortcuts/hotkeys. I mostly work on my MacBook, and the less I have to leave the keyboard the better!
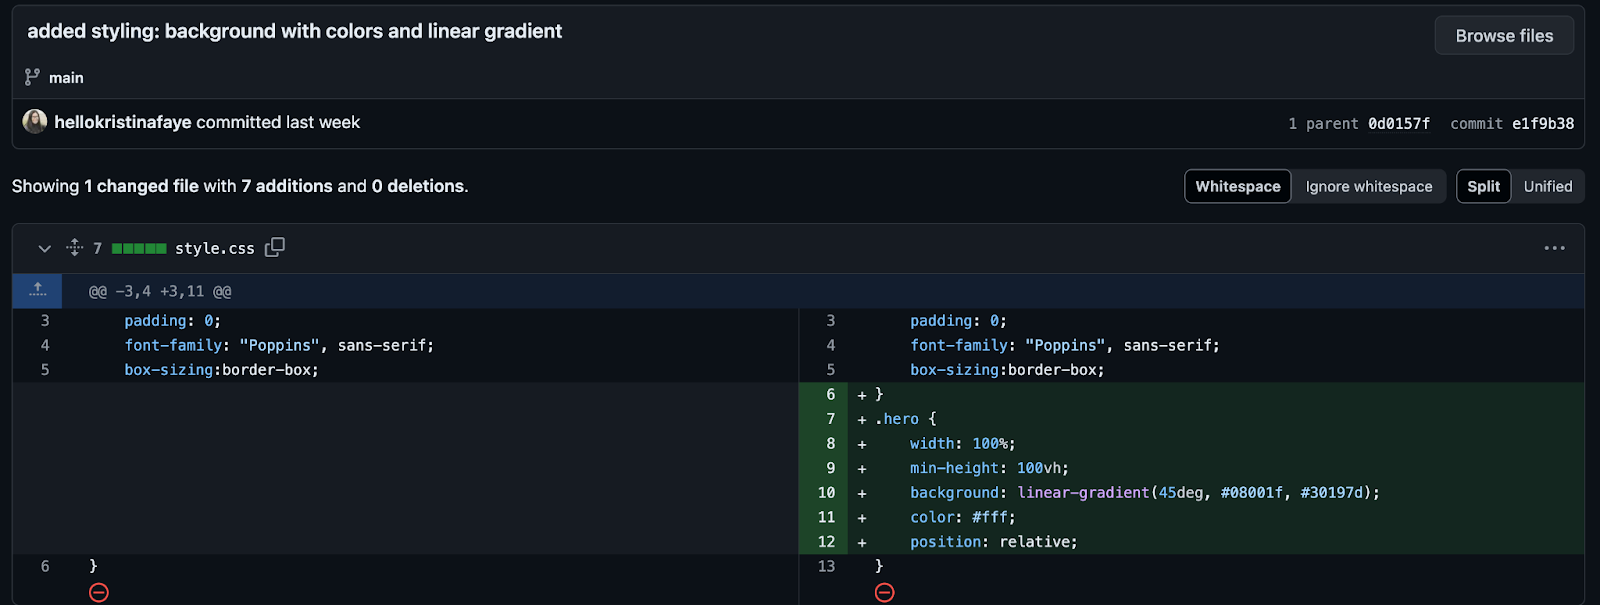
This is another example of something this Channel (and that other one) do really well is including great styling. I really love it because when you’re finished, you have the very real gratification of having a beautiful product in front of you. Like, you learned some skills, and you’re rewarded with this visually appealing webpage. Plus, I get to see the CSS rules required to achieve these things. It’s kind of like following a new recipe to learn new techniques versus creating a brand new dish from scratch to try out those techniques.
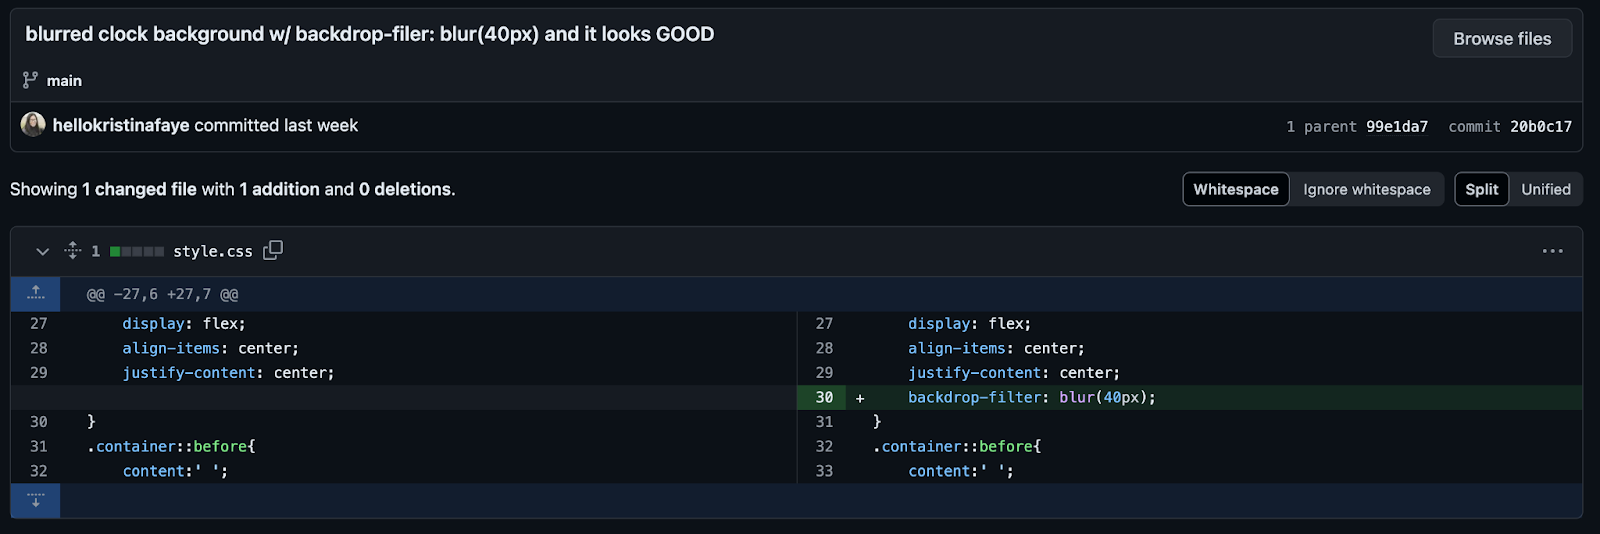
This is an example of the above techniques. Like, BLUR??!?! What a cool feature to have in your wheelhouse.
By the way, when I get a job in web development, I will absolutely follow whatever professional style and etiquette rules there are. Until then, I’m kind of adopting a YouTuber’s casual presence, I hope that’s OK for readability, and relatability.

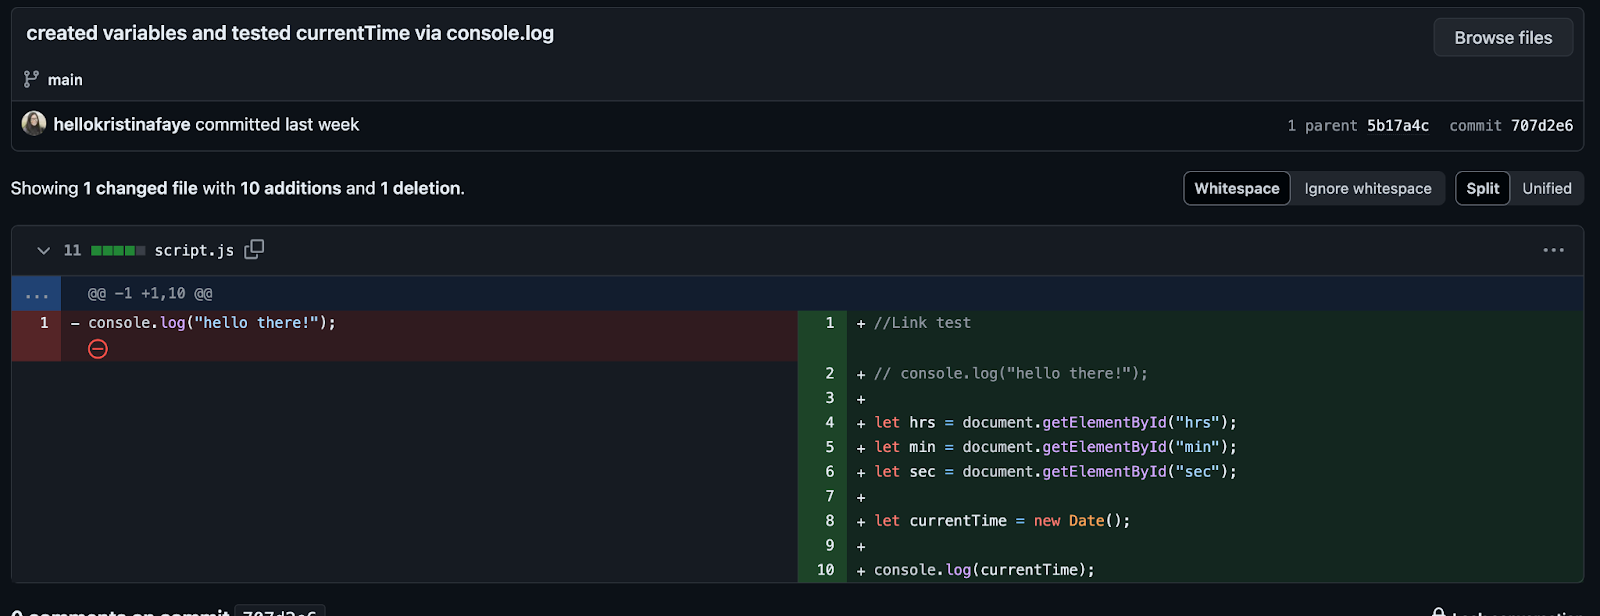
This one is fun because it’s the start of JS and I’m testing the functionality of currentTime by logging it in the console. I did this a LOT in bootcamp, as a student and as a TA, because JS doesn’t always provide visual feedback. Most of the time it’s just doing its little calculations back there somewhere, but it doesn’t like, show you anything. Like, lines 4-6 are correct in syntax, but don’t produce a visible change on their own. You have to tell JS to show you stuff on the webpage. Even in the console, you have to tell it to print by including console.log(). It’s a great tool to test how far your code goes before it hits an error. So you pop a few console.log()’s into your code, right underneath the line that you think may or may not work. If your messages show up in the console, you’re good, but if they don’t, you know where the code stops working.
(back to light mode lol)
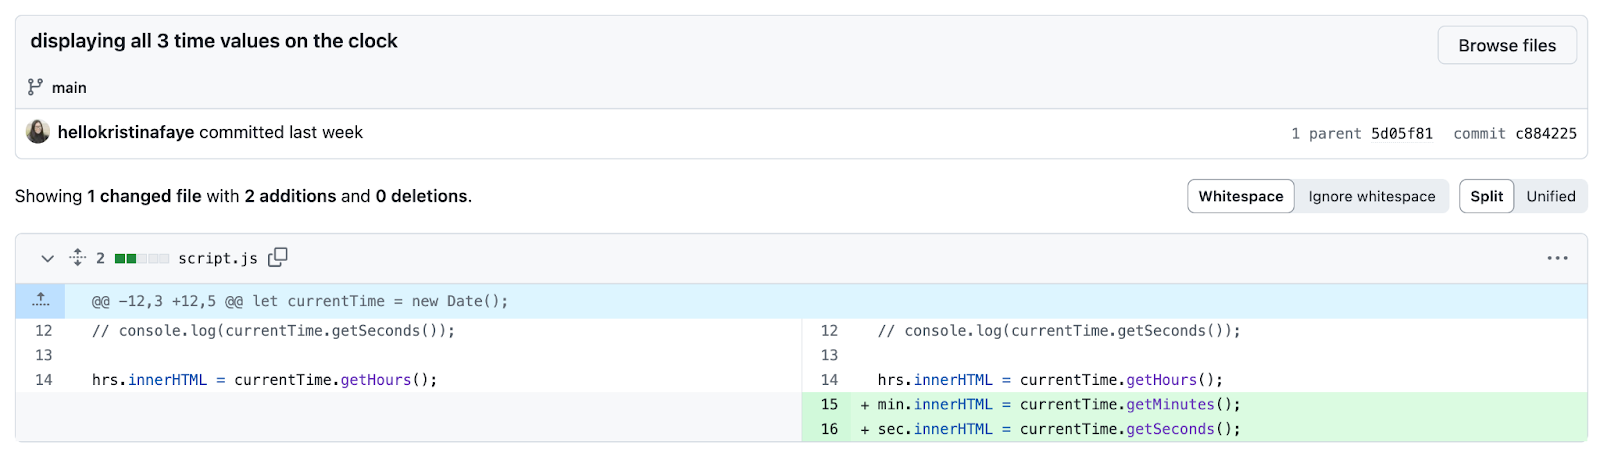
But OK so this one is cool because it shows how I set one line up before scaling it up to the next two lines. “.innerHTML”, when paired with “getElementByID” will populate an HTML element with whatever you assign it in JS, so we were able to see the HTML text update in “#hrs” in the browser. That’s how I knew the code was worthy of scaling up to the next two lines (#min and #sec).
So by the end of this commit my digital clock is displaying the correct current time upon load. However, it just stays there, static. You have to refresh the page any time you want the actual current time. We fix this in the next commit.
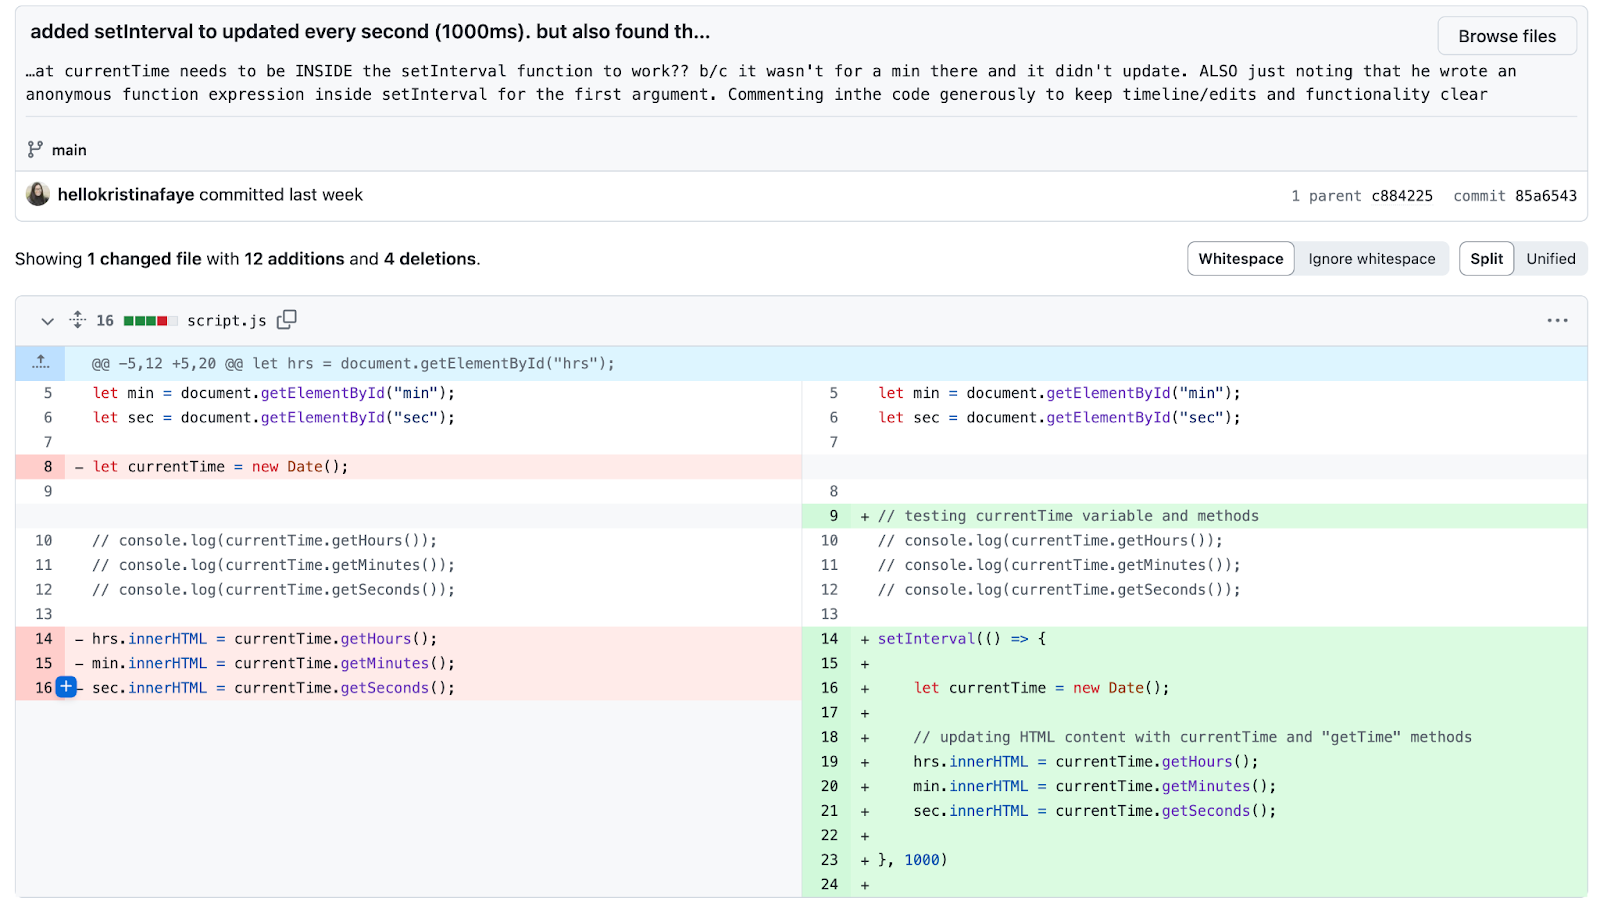
Here we utilize the setInterval() method/function which accepts 2 parameters:
- The code block to execute
- How often to execute, in milliseconds.
- There may be more acceptable parameters, but these are the relevant ones to this context.
And as stated in my commit message, I originally had line 16 (let currentTime…) outside of the setInterval function, and it didn’t work! So I had to do a little debugging to see where the problem was. I’m not super sure what the problem is, I know it has to do with scope, and what variables are available to what functions, but to be honest, I thought that a variable declared outside of a function is globally accessible. So it must have to do with the setInterval() function?? Like maybe there’s a second layer of rules I’m not aware of? I’m happy to learn more about this, but sometimes I just don’t have the bandwidth to dive deep into every aspect. So if anyone knows, please tell me in the comments! xo.
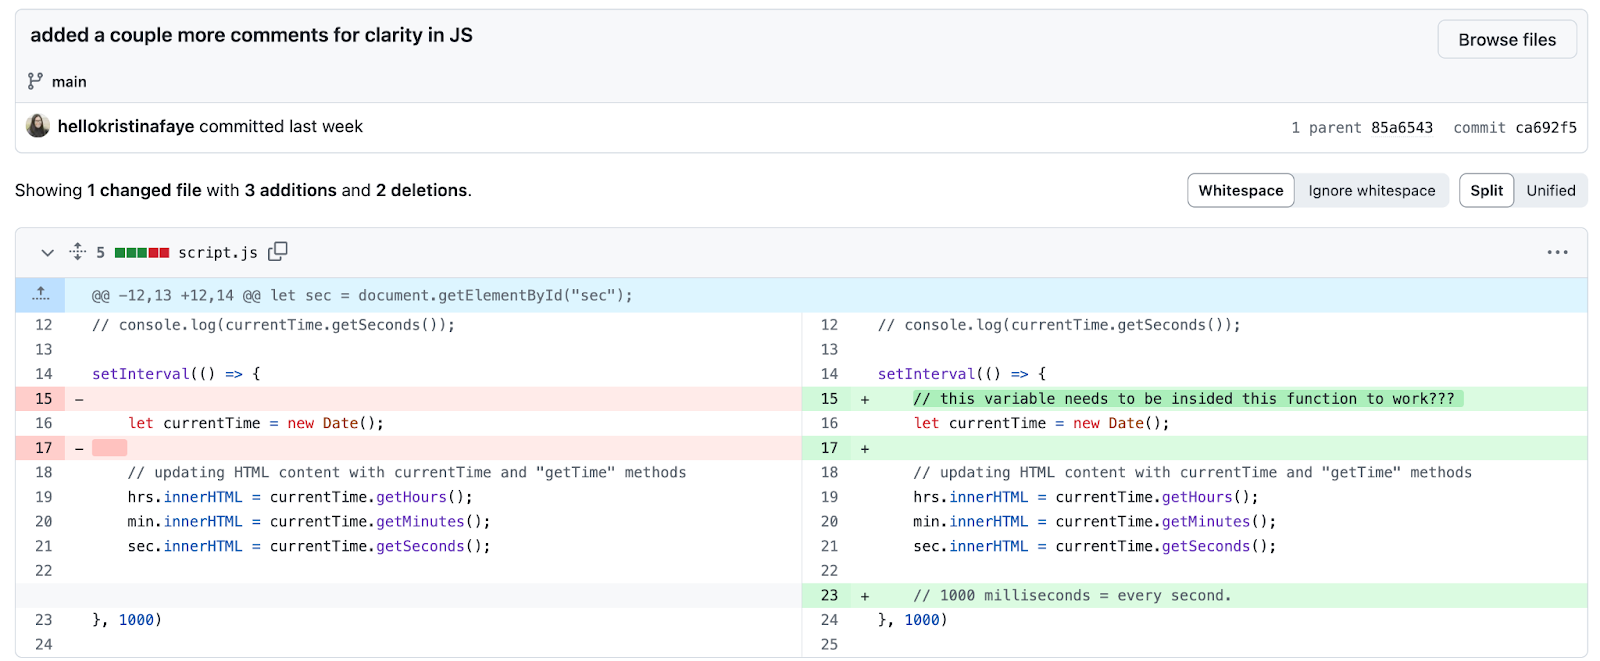
And on the right is how it’s actually left in my code. This is mostly for myself to get live commentary on code functionality. I’ve read that this isn’t really what comments are for, but it works really well for me! Someday when I’m better at JS maybe I won’t need the little training wheels comments.
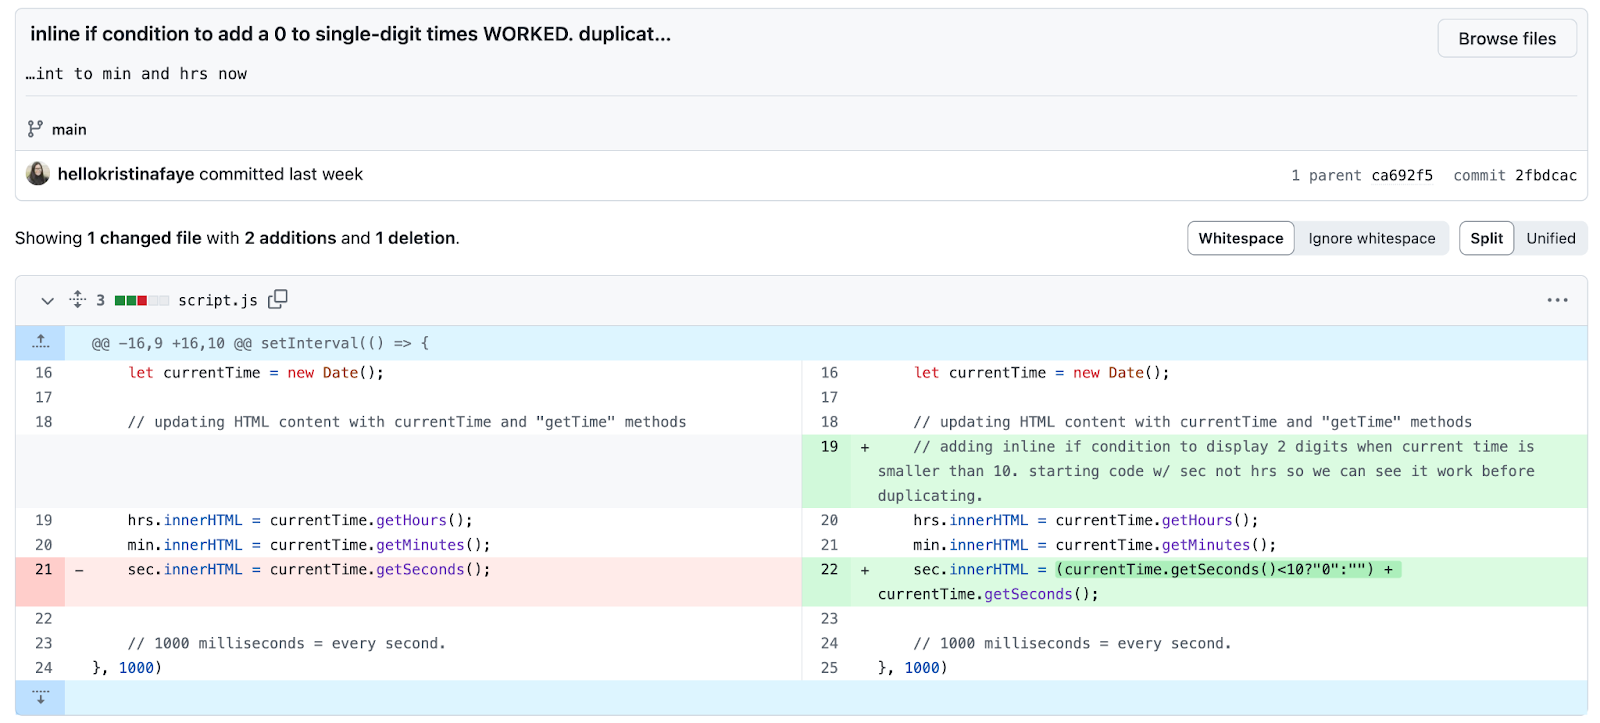
This is so that the digital clock will consistently display 2 characters for each time unit, even if the time unit is under 10 (like 1, 2, 5, will display as 01, 02, or 05, etc.). It’s a pretty small aesthetic detail, and IMHO a little subjective on whether its necessary, but I’m glad for the extra skill to learn, AND I’m sure (especially because I’m so new) that this does reflect some sort of best practice.
Anyway it leverages a ternary operator, which is a great shorthand conditional statement. Like an if/else statement, but with punctuation instead of words/spaces/brackets. Great for simple one-liners, and in our case, including inside other code.
The operator states that if the currentTime is less than 10 concatenate a string of “0” to the line in front of currentTime, otherwise add nothing (denoted by an empty string “”).
In the tutorial, he starts with hours, then adds it to minutes and seconds, but I started with seconds because then I could see the results working within a minute before scaling up. Oh, I was also working on this when both hours and minutes were over 10, and he might have been under. Either way, I started with the line that would produce a visible result/positive feedback before scaling up to the other lines.
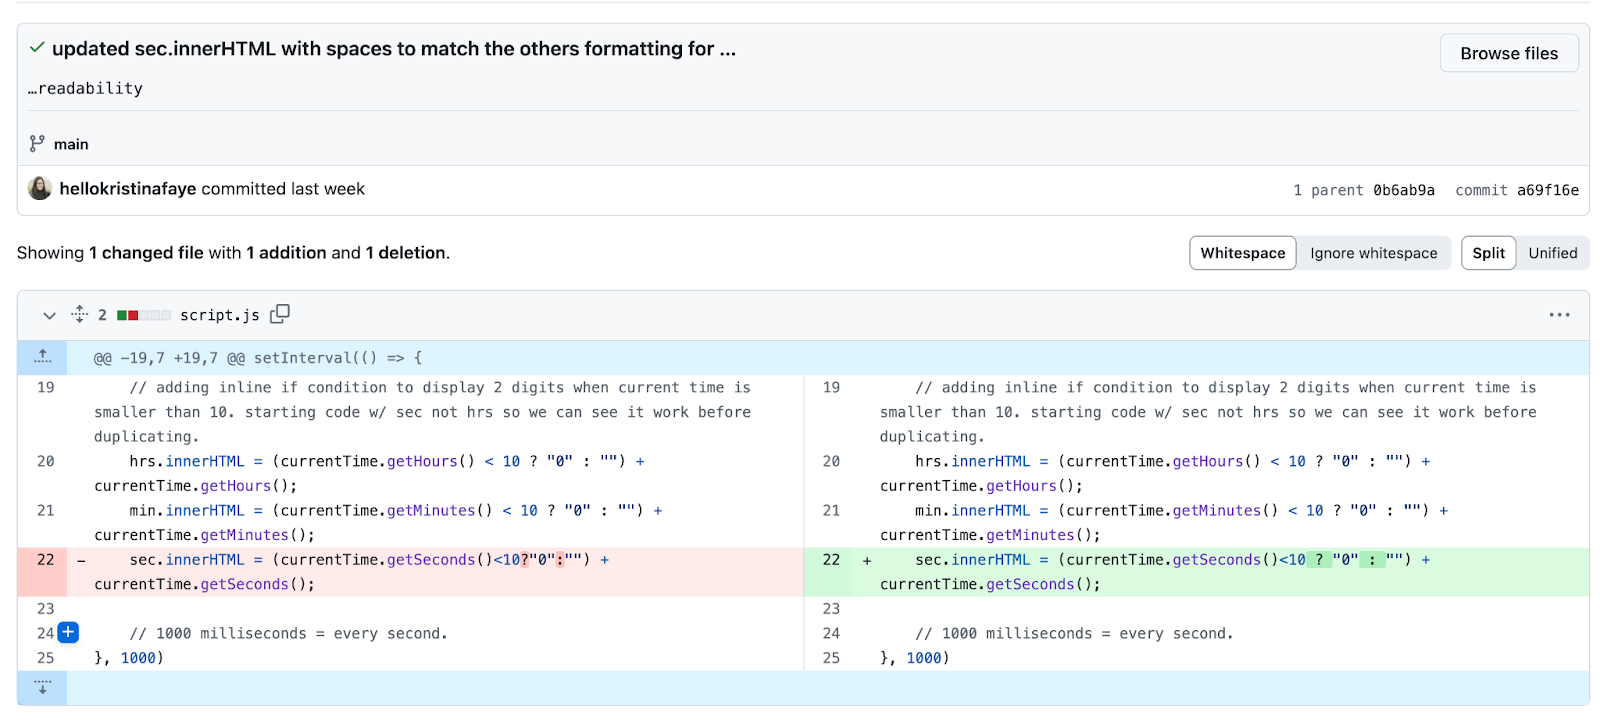
And here’s the final commit as of the writing of this blog! VSCode had added a few spaces for readability so I matched it on the line that I had written.
You can check the link at the top of the page to see this repo on GitHub, or even the live, deployed page to use as a clock on your own computer.
Thanks for reading!
Leave a Reply